After a long wait I finally received my Google $35 Chromecast HDMI Dongle that I had ordered from Amazon 8 weeks earlier,
How Useful is Chromecast?
For years I had been watching Netflix and local HDTV stations on my dedicated Windows Media Center PC, so I wasn't sure how useful Chromecast would be for me, but I quickly became enamored by its ability to "cast" YouTube videos, Chrome browser tabs, and my desktop apps from my laptop onto my large screen TV (see: http://www.droid-life.com/2013/07/26/tip-chromecast-can-cast-your-entire-desktop-screen-too-not-just-tabs/).
I am finally able to view all my Flickr and Picasa photo albums that I keep on my laptop directly on my large screen TV; and I am able to sit on my sofa and use my Nexus 7 tablet and Android phone as my "remote".
Why do I really need an HDMI switcher?
[Note: If you own a recent model TV with HDMI version 1.3 or higher, there is a good chance that it incorporates some of the "smart" HDMI-CEC features described above, in which case the following info may not apply to you.]
I first plugged the Chromecast dongle into my TV's second HDMI Input-2, and its +5V USB power cable into the USB port on my TV. But then every time I wanted to watch live TV on the Media Center using my Xbox Remote, I found myself hunting around for my other seldom-used TV remote control in order to to switch the TV's input source away from Chromecast's dedicated HDMI input-2 over to the Media Center's Input. Or alternatively, I had to switch sources from Input-1 to Input-2 in order to watch something on Chromecast. Wasn't there another way to automate this process?
An Inexpensive Alternative:
I found an 3X1 HDMI Video Switcher on Amazon for less than $10. It claimed to offer the CEC automatic video switching capability. According to the manufacturers description:
Hooking up the Portta 3X1 Switcher
 |
| Google Chromecast Dongle (click image to order on Amazon with free shipping) |
For years I had been watching Netflix and local HDTV stations on my dedicated Windows Media Center PC, so I wasn't sure how useful Chromecast would be for me, but I quickly became enamored by its ability to "cast" YouTube videos, Chrome browser tabs, and my desktop apps from my laptop onto my large screen TV (see: http://www.droid-life.com/2013/07/26/tip-chromecast-can-cast-your-entire-desktop-screen-too-not-just-tabs/).
I am finally able to view all my Flickr and Picasa photo albums that I keep on my laptop directly on my large screen TV; and I am able to sit on my sofa and use my Nexus 7 tablet and Android phone as my "remote".
Why do I really need an HDMI switcher?
[Note: If you own a recent model TV with HDMI version 1.3 or higher, there is a good chance that it incorporates some of the "smart" HDMI-CEC features described above, in which case the following info may not apply to you.]
I first plugged the Chromecast dongle into my TV's second HDMI Input-2, and its +5V USB power cable into the USB port on my TV. But then every time I wanted to watch live TV on the Media Center using my Xbox Remote, I found myself hunting around for my other seldom-used TV remote control in order to to switch the TV's input source away from Chromecast's dedicated HDMI input-2 over to the Media Center's Input. Or alternatively, I had to switch sources from Input-1 to Input-2 in order to watch something on Chromecast. Wasn't there another way to automate this process?
Are there any "Smart HDMI Switching" solutions?
Searching the web about the HDMI video standard I found out that there is an optional Consumer Electronic Control (CEC) feature of the HDMI specification that enables manufacturers of consumer electronic equipment to incorporate "smart HDMI" switching features into their audio / video products. Philips markets the HDMI-CEC feature under the proprietary name ‘EasyLink’ However, manufacturers have been slow to adopt smart input switching capabilities into their devices, and unfortunately my 47" Philips HDTV did not offer this feature when I purchased it in 2007.
What can CEC do for me?
CEC can automatically power-on the appropriate products, route the DVD player's audio output through the A/V receiver to attached speakers, and route the player's motion picture to the Digital TV. Likewise, selecting a channel on the set-top box will cause television audio to replace movie audio on the speakers and a television picture to replace the movie picture on the Digital TV.
Refer to the following links for more information on HDMI-CEC:
- http://www.eetimes.com/document.asp?doc_id=1273818
- http://gigaom.com/2013/07/24/chromecast-hdmi-cec/
- http://reviews.cnet.com/digital-media-receivers/google-chromecast/4864-6739_7-35823617-1.html
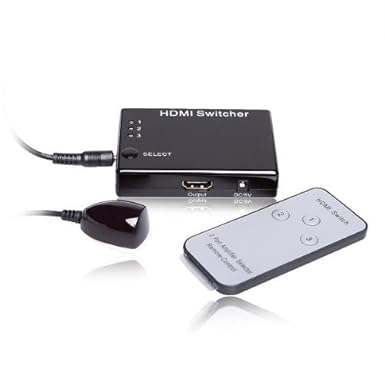 |
Portta PET0301S 3x1 HDMI Switcher(click image to order from Amazon) |
I found an 3X1 HDMI Video Switcher on Amazon for less than $10. It claimed to offer the CEC automatic video switching capability. According to the manufacturers description:
"The Portta PET0301S 3x1 HDMI Switcher routes high definition video (in multiple resolutions up to 1080p) and digital audio from any one of the three sources to display unit. The output sends the high definition audio/video signals to a high definition display. This kind of the HDMI Amplifier Switcher not only has the key-press-switching function, but also has the IR remote control and intelligent function. No power need for this item with HDMI standard device, so it does not include the power adapter"
- Step 1: I connected one end of an HDMI cable into my TV's HDMI Input 1, and the other end into the HDMI output of the Portta switcher. I then attached the Chromecast dongle to the Switcher's HDMI Input #1 and the Windows Media Center PC to the Switcher's HDMI Input #2. In my case, the Portta Switcher was shipped without an AC power adapter, and because of the manufacturer's description above I assumed that I didn't need one. However, when I powered up the TV nothing happened! This implied that my older Philips 47" TV does not meet the CEC criteria of being able to supply power to peripherals via its HDMI connectors.
- Step 2: Since the Chromecast dongle was shipped with an optional AC power supply as well as a USB power cable, and since my 47" TV has a USB port on the side, I decided to plug the Chromecast's USB cable into the USB port on my TV. As soon as I turned on my TV - voila! - I got a Chromecast display on the screen.
- From the above I concluded that without a separate AC adapter, the Portta switcher is also capable of drawing its power from any of the HDMI devices plugged into it, providing those devices can supply +5VDC to the switcher via pin 19 of their HDMI connectors. It also proves that my older TV set does not have this capability.
- Chromecast Dongle to the rescue: In my case my only option was to get power for the switcher from the Chromecast dongle - either by connecting the dongle's USB cable to my TV's USB port, or by plugging the same cable into its AC power module. Since I did not want the Chromecast to stay on when the TV was off, l chose the first approach. Now, power is supplied to the dongle only when the TV is on.
 |
| Switcher hookup for Chromecast |

